Welcome to my new blog. In my blog I would like to share information about old metal forming technologies and to receive feedback. The first project is an anticlasting bracelet.


Step 1 - Preparing the cylinder.
For the bracelet I cut a strip of 1mm copper sheet to 50 x 264mm. with a fine saw cut 4 slots about 10mm from the edge. Bevel the six contact surfaces in opposite directions in order not to increase the material thickness after soldering.
Step 2 - Preparing for soldering
Anneal the metal, roll it to a cylindrical shape, match both ends of the copper strip and hammer the joint area to full contact. Bind the cylinder with a steel wire and put some spacers in order to prevent the wire to be soldered to the copper.
Solder the cylinder from the outer perimeter. (The outer perimeter of the cylinder is going to be the inner perimeter of the bracelet).

Solder the cylinder from the outer perimeter. (The outer perimeter of the cylinder is going to be the inner perimeter of the bracelet).

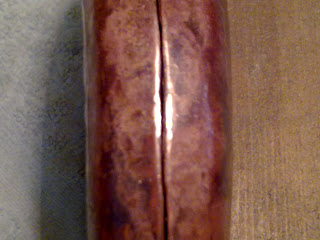
This is how it looks after soldering and pickling. I prefer to leave the solder line to be seen on the final product.


Step 3 - Raising
The left photo shows the anticlastic stakes that I used (Thanks Giora Biran and Michael Yinhar)
to make the bracelets. All the stakes are clamped in a vice.
On the right photo the bracelet is seen on the stake during the first course. The material should be annealed between courses.


Great Work and demo!!
ReplyDeleteVery nice work! Thanks for the step by step. You should put more of your projects on your blog.
ReplyDelete(BucketObolts)
This comment has been removed by the author.
ReplyDeleteThis is really a copper mug better than those Moscow Mule copper mugs in amazon.com
ReplyDelete